- .Net Core 2.1 SDKのダウンロード SDK 2.1.808 64bit版
- .Net Core 2.1 SDKのインストール
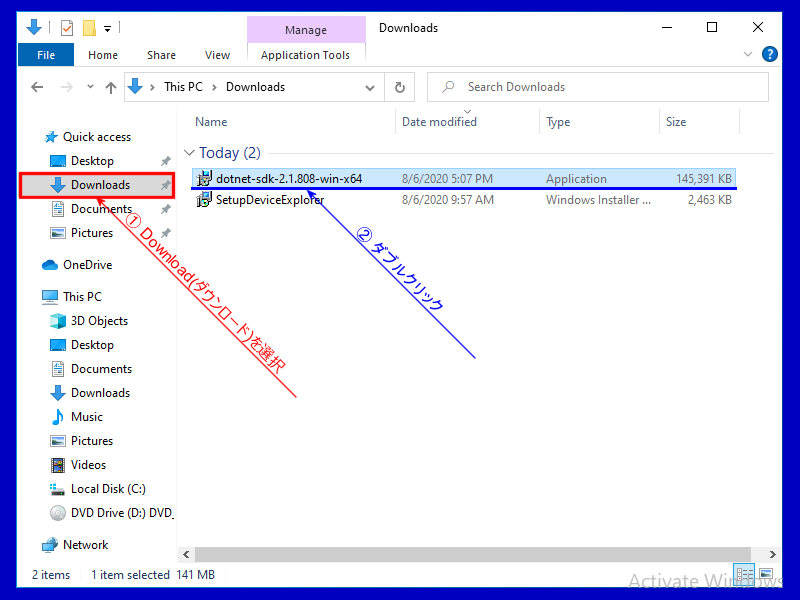
- エクスプローラでダウンロードしたフォルダを開いて
- dotnet-sdk-2.1.808-win-x64.exeをダブルクリックし、SDKのインストーラを起動します。
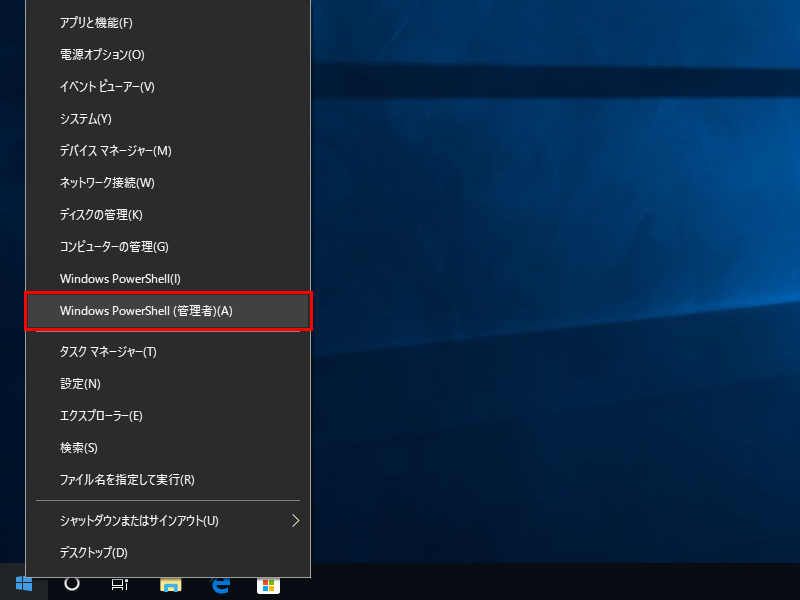
- Powershellの起動 スタートボタンを右クリックし、[Windows Powershell(管理者)]をクリックします。
- .Net Core SDKバージョンの確認 Powershellが起動したら、先ほどインストールした.Net Core 2.1 SDKのバージョンを確認します
- 作業フォルダの作成 .Net Core 2.1 SDKを利用した開発作業を行うための作業フォルダを作成します
- .Net Core用の作業フォルダを作成 md C:\work
- 作成した作業フォルダへ移動 cd C:\work
- 作業フォルダ内にアプリ用のフォルダを作成 md SimTemp
- 作成したアプリフォルダに移動 cd .\SimTemp
- トレーニング用のサンプルアプリの入手と展開 トレーニング用に編集済のソースコードをダウンロードし、作成したアプリ用フォルダに解凍しててください
- サンプルアプリがダウンロードフォルダにあるか確認 ls $Env:HOMEPATH\Downloads\SimulatedDevice.zip
- Expand-Archiveコマンドを利用してファイルを展開 Expand-Archive -Path $Env:HOMEPATH\Downloads\SimulatedDevice.zip -DestinationPath .\
- 正しく展開できているか確認 ls
- パッケージの復元とソースコード編集 展開されたサンプルアプリのパッケージを復元し、各自で用意したIoT Hubへ接続するためにソースコードの編集を行います
- ダウンロードしたパッケージを復元 dotnet restore
- ソースコードをエディタで編集 notepad .\SimulatedDevice.cs
- SimulatedDevice.csの接続文字列を修正する {your device connection string here}を接続したいDeviceのプライマリ接続文字列と置き換えます
- サンプルプログラムの修正:送信データ項目の追加 複数のデバイスを接続する際にどのデバイスから送信されたデータ判別できるようにデバイス固有の名前(id)を追加します
- サンプルプログラムの実行 実際にサンプルプログラムを実行してみます
SDK 2.1.808 32bit版
上記のリンク、または.NET Coreのダウンロードサイトから、
[All .NET Core downloads] → [.NET Core 2.1]を開き、.Net Core 2.1のSDKをダウンロードし、
開発で利用するPCにインストールしてください
※ 必ずRuntimeではなく、開発に必要なSDKを入手してください
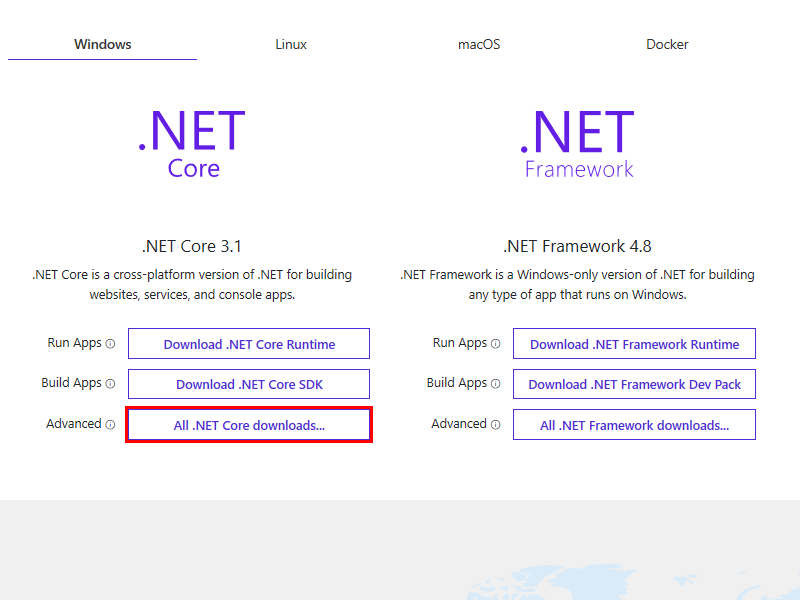
All .NET Core downloads...
[All .NET Core downloads...]をクリックしすべての.Net Coreのダウンロードページを開きます。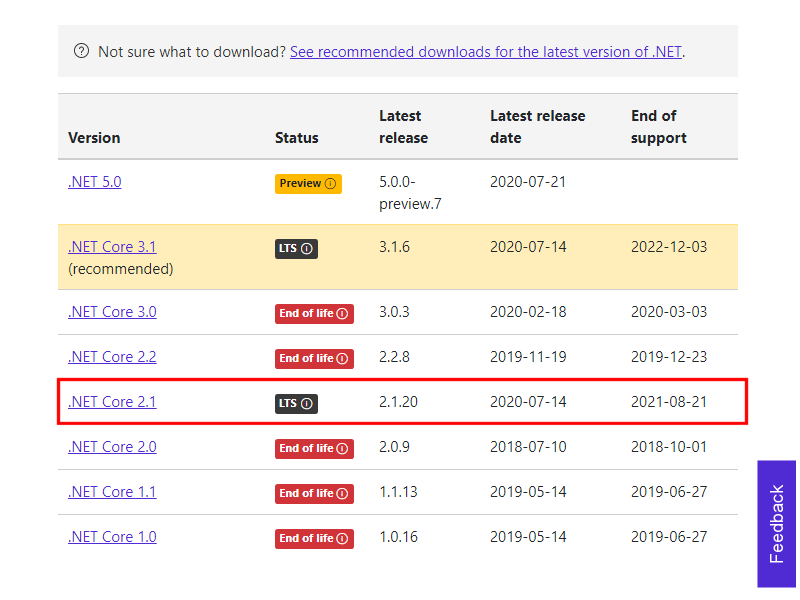
.NET Core 2.1 [LTS] ...
[.NET Core 2.1 [LTS] ...]をクリックし.Net Core 2.1のダウンロードページを開きます。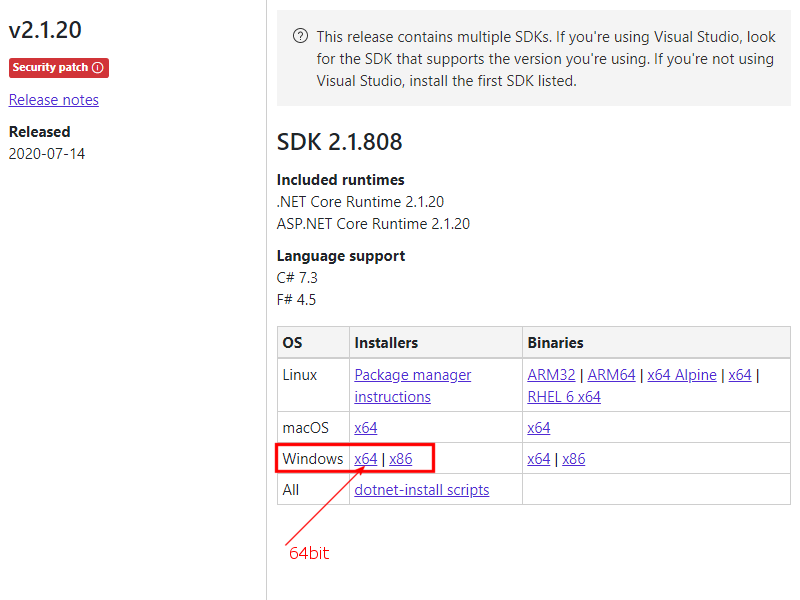
Windows x64 | x86
ターゲット環境に合わせてWindows用のSDK 2.1.808のInstallersからファイルをダウンロードします。※ Azure Start kitではSDK 2.1.808 64bit版を選択します。
ダウンロードが開始され、デフォルトでは「ダウンロード」フォルダに「dotnet-sdk-2.1.808-win-x64.exe」として保存されます。
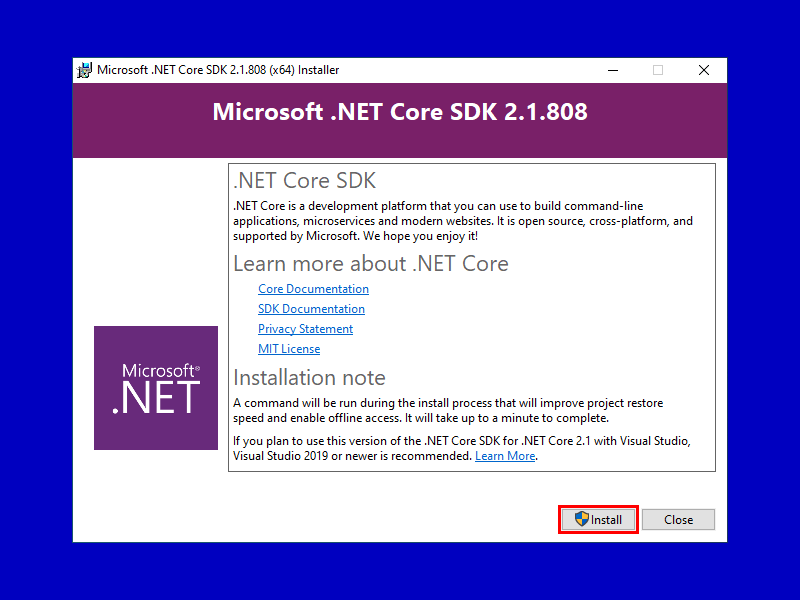
Install
バージョンなど確認し、問題なければ右下の[Install]をクリックします。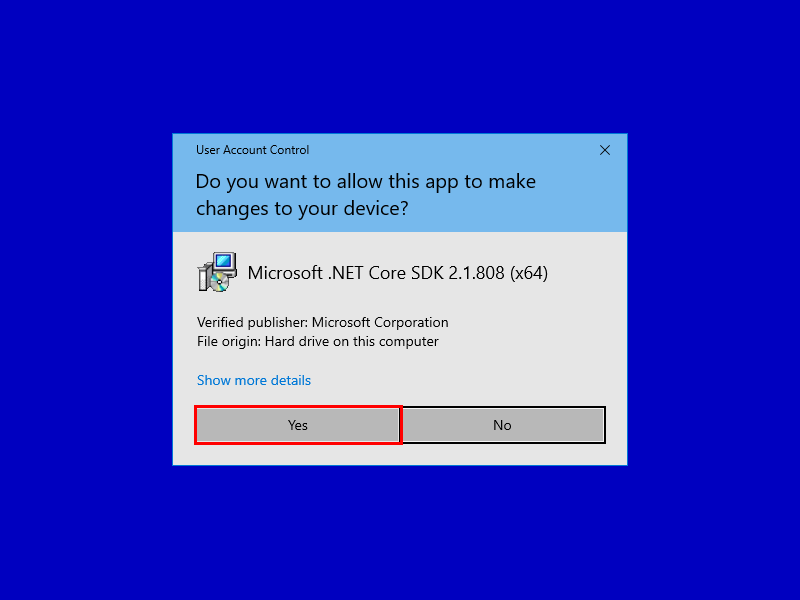
Yes
「このアプリがデバイスに変更を加えることを許可しますか?」と聞いてくるので[ Yes ]をクリックし、変更を許可し、インストールを続行します。
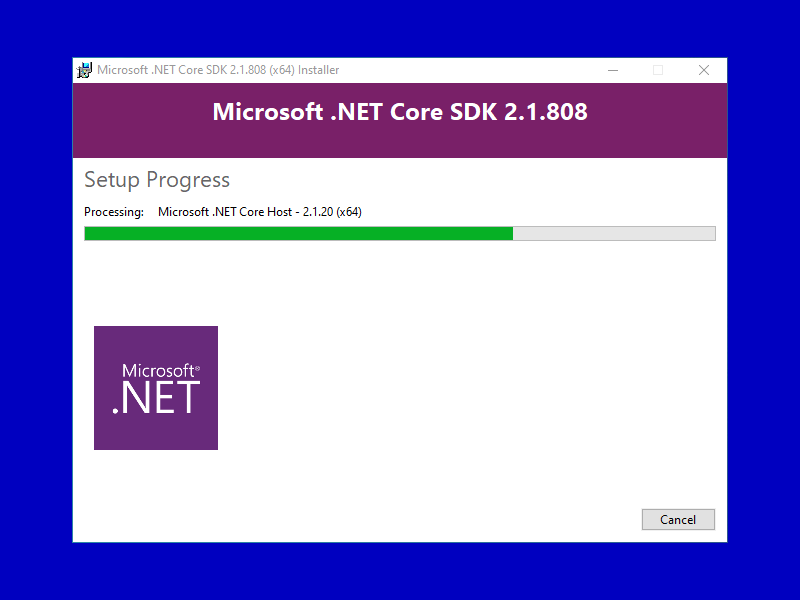
利用する環境にもよりますが、数分程度で終了すると思います。
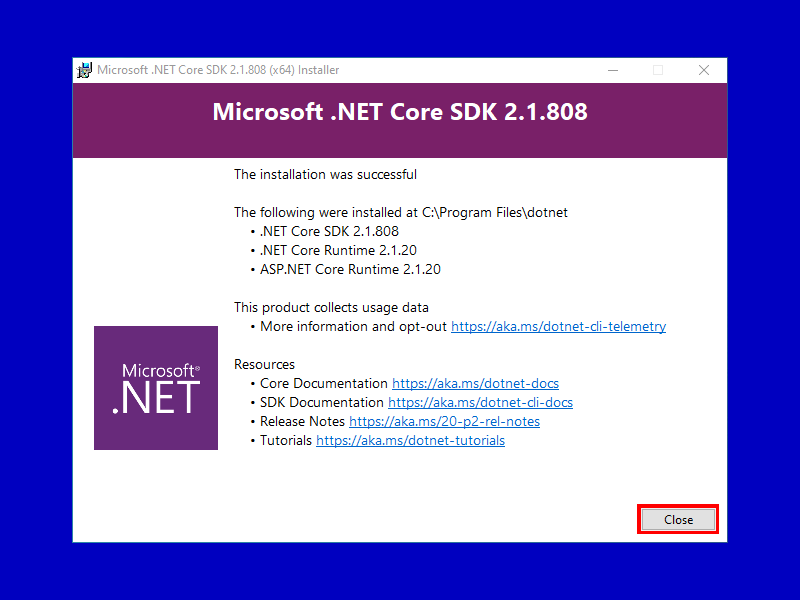
Close
The install was successfulと表示されれば、インストールは終了です。[ Close ]をクリックし、インストーラを終了します。
PS C:\Windows\System32> dotnet --info
SDKとRuntimeのバージョン(赤字)を確認してください
実行結果
Windows PowerShell
Copyright (C) Microsodt Corparation. All rights reserved.

Try the new cross-platform Powershell https://aka.ms/pscore6

PS C:\windows\system32> dotnet --info
.NET Core SDK (reflecting any global.json):
 Version:   2.1.808
 Commit:    26d90c33fc

Runtime Environment:
 OS Name:     Windows
 OS Version:  10.0.xxxxxx
 OS Platform: Windows
 RID:         win10-x64
 Base Path:   C:\Program Files\dotnet\sdk\2.1.808\

Host (useful for support):
  Version: 2.1.20
  Commit:  39cc55013c

.NET Core SDKs installed:
  2.1.808 [C:\Program Files\dotnet\sdk]

.NET Core runtimes installed:
  Microsoft.AspNetCore.All 2.1.20 [C:\Program Files\dotnet\shared\Microsoft.AspNetCore.All]
  Microsoft.AspNetCore.App 2.1.20 [C:\Program Files\dotnet\shared\Microsoft.AspNetCore.App]
  Microsoft.NETCore.App 2.1.20 [C:\Program Files\dotnet\shared\Microsoft.NETCore.App]

To install additional .NET Core runtimes or SDKs:
  https://aka.ms/dotnet-download
PS C:\windows\system32>
実行結果
PS C:\WINDOWS\system32> md \work


    ディレクトリ: C:\


Mode                LastWriteTime         Length Name
----                -------------         ------ ----
d-----       2019/07/03     13:27                work


PS C:\WINDOWS\system32> cd \work
PS C:\work> md SimTemp

    ディレクトリ: C:\work

Mode                LastWriteTime         Length Name
----                -------------         ------ ----
d-----       2019/07/03     13:27                SimTemp

PS C:\work> cd .\SimTemp\
PS C:\work\SimTemp>
ファイルの保存先、展開方法に関しては各自のやり易い方法でも大丈夫です。
参考までにPwoershellで行う場合は以下の手順となります。
PS C:\work\SimTemp> ls $Env:HOMEPATH\Downloads\SimulatedDevice.zip


    ディレクトリ: C:\Users\neko\Downloads


Mode                LastWriteTime         Length Name
----                -------------         ------ ----
-a----       2020/07/09     21:36           1726 SimulatedDevice.zip


PS C:\work\SimTemp> Expand-Archive -Path $Env:HOMEPATH\Downloads\SimulatedDevice.zip -DestinationPath .\
PS C:\work\SimTemp> ls


    ディレクトリ: C:\work\SimTemp


Mode                LastWriteTime         Length Name
----                -------------         ------ ----
-a----       2020/01/17     10:16            292 simulated-device.csproj
-a----       2020/01/17     10:19           3133 SimulatedDevice.cs


PS C:\work\SimTemp>
ポイント!(今回は必要ありません)
編集前のオリジナルのソースコードが必要な場合はGitHubから入手できます
上記のリンク、または下記のサイトを開いてサンプルプログラムをダウンロードします
https://github.com/Azure-Samples/azure-iot-samples-csharp/tree/master/iot-hub/Quickstarts/simulated-device
※ ソースコードを編集する場合の注意点としてUTF-8対応のエディタを利用してください。
Start Kit(Windows 10)はメモ帳(notepad.exe)で大丈夫です
実行結果
PS C:\work\SimTemp> ls


    ディレクトリ: C:\work\SimTemp


Mode                LastWriteTime         Length Name
----                -------------         ------ ----
-a----       2020/01/17     10:16            292 simulated-device.csproj
-a----       2020/01/17     10:19           3133 SimulatedDevice.cs

PS C:\work\SimTemp> dotnet restore
  C:\work\SimTemp\simulated-device.csproj の復元が xx.xx sec で完了しました。
PS C:\work\SimTemp> notepad .\SimulatedDevice.cs
IoT Hubの共有アクセスポリシーの接続文字列-プライマリキーではないので注してください
※接続文字列内にDeviceID=が含まれていることを確認し、{}は含めずに文字列を""で囲みます
// Copyright (c) Microsoft. All rights reserved.
// Licensed under the MIT license. See LICENSE file in the project root for full license information.

// This application uses the Azure IoT Hub device SDK for .NET
// For samples see: https://github.com/Azure/azure-iot-sdk-csharp/tree/master/iothub/device/samples

using System;
using Microsoft.Azure.Devices.Client;
using Newtonsoft.Json;
using System.Text;
using System.Threading.Tasks;

namespace simulated_device
{
    class SimulatedDevice
    {
        private static DeviceClient s_deviceClient;

        // The device connection string to authenticate the device with your IoT hub.
        // Using the Azure CLI:
        // az iot hub device-identity show-connection-string --hub-name {YourIoTHubName} --device-id MyDotnetDevice --output table
        private readonly static string s_connectionString = "{Your device connection string here}";
                                   {Your device connection string here}↑を作成したDeviceの接続文字列と置き換える↓
        private readonly static string s_connectionString = "HostName=OEC-Test.azure-devices.net;DeviceId=OecDev01;SharedAccessKey=*******************************************=";

        // Async method to send simulated telemetry
        private static async void SendDeviceToCloudMessagesAsync()
"{your name}"を任意の文字列へ変更してください→"Sensor01"など
また、通信エラーなどでリトライを行った場合、送信内容が一意のデータであることを判別するために、
測定時、取得時などの時間情報を付加しておくと後で役立ちます
long unixtime = (long)(DateTime.UtcNow - new DateTime(1970, 1, 1)).TotalMilliseconds; // Linux時刻を取得
sendid =name+"-"+unixtime.ToString("000000000000"); // Device名とLinux時刻を連結
サンプルプログラムの修正が終わったら、ファイルを保存して下さい
                // Get Unix Time
                long unixtime = (long)(DateTime.UtcNow - new DateTime(1970, 1, 1)).TotalMilliseconds;	// Linux 時刻を取得    ←追加する

                // Create JSON message
                var telemetryDataPoint = new
                {

                    name = "{Your Name}",
                    sendid = "{Your Name}"+unixtime.ToString("-000000000000"),    ←追加する
                    temperature = currentTemperature,
                    humidity = currentHumidity
                };
Deviceとの接続文字列が正しく設定されていれば、以下のような画面が表示されると思います
また、デバイスの固有情報(赤字部分)が追加されているか出力画面で確認してください
PS C:\work\SimTemp> dotnet run
IoT Hub Quickstarts #1 - Simulated device. Ctrl-C to exit.

2019/07/30 16:26:36 > Sending message: {"name":"Sensor01","sendid":"Sensor01-1564471595829","temperature":30.712722610082814,"humidity":68.48270042263097}
2019/07/30 16:26:37 > Sending message: {"name":"Sensor01","sendid":"Sensor01-1564471597451","temperature":21.779690965441844,"humidity":73.946073760253412}
2019/07/30 16:26:38 > Sending message: {"name":"Sensor01","sendid":"Sensor01-1564471598491","temperature":31.575226118590322,"humidity":67.70453897663603}
2019/07/30 16:26:39 > Sending message: {"name":"Sensor01","sendid":"Sensor01-1564471599530","temperature":27.051496839640429,"humidity":73.840918230750091}
2019/07/30 16:26:40 > Sending message: {"name":"Sensor01","sendid":"Sensor01-1564471600570","temperature":34.024024821829059,"humidity":74.0475238831935}
2019/07/30 16:26:41 > Sending message: {"name":"Sensor01","sendid":"Sensor01-1564471601601","temperature":22.899094365024517,"humidity":69.199914778210186}
2019/07/30 16:26:42 > Sending message: {"name":"Sensor01","sendid":"Sensor01-1564471602630","temperature":28.789402432176004,"humidity":68.492886325573963}
2019/07/30 16:26:43 > Sending message: {"name":"Sensor01","sendid":"Sensor01-1564471603661","temperature":26.866686792050807,"humidity":65.214441123052708}
2019/07/30 16:26:44 > Sending message: {"name":"Sensor01","sendid":"Sensor01-1564471604690","temperature":21.874282922071536,"humidity":63.123421791532742}
2019/07/30 16:26:45 > Sending message: {"name":"Sensor01","sendid":"Sensor01-1564471605720","temperature":33.91832797504884,"humidity":77.207286459024658}
2019/07/30 16:26:46 > Sending message: {"name":"Sensor01","sendid":"Sensor01-1564471606761","temperature":30.053892664170775,"humidity":78.883632877321745}
2019/07/30 16:26:47 > Sending message: {"name":"Sensor01","sendid":"Sensor01-1564471607790","temperature":28.788778343605241,"humidity":69.689796236199228}
2019/07/30 16:26:48 > Sending message: {"name":"Sensor01","sendid":"Sensor01-1564471608821","temperature":27.845380416999284,"humidity":65.620333936819961}
2019/07/30 16:26:49 > Sending message: {"name":"Sensor01","sendid":"Sensor01-1564471609860","temperature":25.912457840010738,"humidity":72.227780414851281}
PS C:\WORK\SimTemp>